5.24.2013

3-D Bird Houses • Silhouette Tutorial

Project Description: 

I have designed patterns for an entire village of embellished birdhouses. Each one is unique and sports decorative cut outs for added interest. The files are sized to work together. The set is growing but currently includes the following files:
  • Heart Bird House
  • Double Decker Bird House
  • Rounded Bottom Bird house
  • Scalloped Edge Birdhouse

The same techniques were used to assemble all of these structures. I have assembled one tutorial but you can follow these steps for any of the designs.


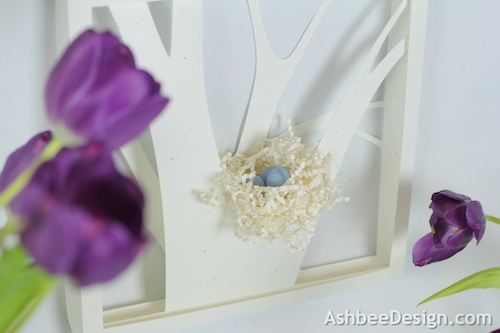
Display a birdhouse village hanging from a gnarled piece of driftwood.


Or add stakes and put them in a container of wheat grass.


Note: 
I am a new Silhouette Contributing Artist. Both my Silhouette files and this website are the beginning. Send along any suggestions, problems, ideas or photos as we learn to create together. I'd love to hear from you!  Marji Roy
eMail: ashbeedesignemail@gmail.com

Tutorial assembled using Silhouette Software Release 2.7.18. This tutorial assumes you already know how to use the Silhouette and Silhouette software.


Supplies Needed:

  • Template from Silhouette On-Line Store (Link to template added herexxxx)
    • Heart Bird House here.
    • Double Decker Bird House here.
    • Rounded Bottom Bird house here.
    • Scalloped Edge Birdhouse here.
  • Glue dots or other fast drying paper glue
  • Silhouette Cameo
  • 1 sheet of patterned paper - for each bird house
  • 1 sheet of contrasting paper - for each bird house
  • 12" 1/8"-1/4" wide ribbon in complementary color
  • 1 tooth pick

Steps for completing the Bird House Project:

1. Download the cutting file for your Silhouette Cutting machine from the Silhouette Online Store at the links noted above. Each file contains the three parts for a specific birdhouse including the basic structure, a roof pattern and a perch pattern.


2. Cut the file.
I like to cut the structure and the roof from contrasting papers. I have used combinations of prints and solids or all solids. The easiest thing to do is print the file twice, on two different papers and then mix and match the roof and structure. Here is a sample of the scallop edge birdhouse done that way.

Before you cut, consider how you will display the birdhouses. If they are going to hang, then you will want to insert a ribbon and the slots are located on the roof. If you are not going to hang them, then you may want to ungroup the file and remove the two roof slots.


Here are all the parts for one birdhouse cut and ready for assembly.
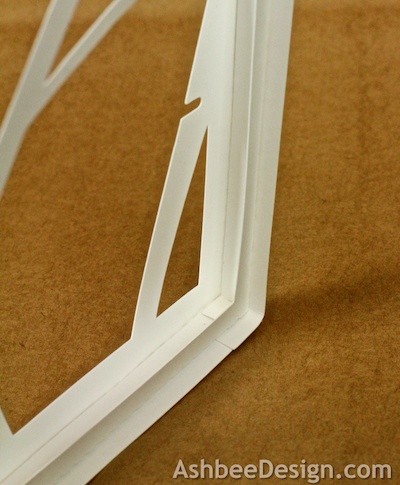


3. Fold the house
  • Note: Each cut file has dotted lines. These are fold lines. 
  • Fold along all fold lines. The folds all go in toward the inside of the birdhouse.


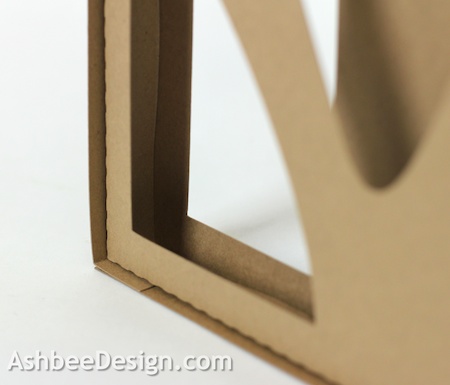
4. Glue tabs in place.
  • I like to use Glue Dots although other glue types are appropriate. 
  • I start by gluing the edges that attach to the birdhouse front in place. I do the back last. This is because you can reach the back more easily through the entry hole for pressing together.
  • I apply 2-3 glue dots per tab....

  • And pressed them in place carefully lining up edges and keeping things square.


  • Once the front and roof are in place, apply glue dots to the remaining tabs for the back side. Carefully position the back and use a skinny tool inserted in the entry hole to press them into place.


5. Add the ribbon and attached the roof.
  • If your bird house is going to hang from a branch, now is the time to thread a ribbon in the slots on the roof.

  • Then apply glue dots to the roof and carefully position it in place. It is designed to have an over-hang in both the front and back.
 6. Add the perch. 

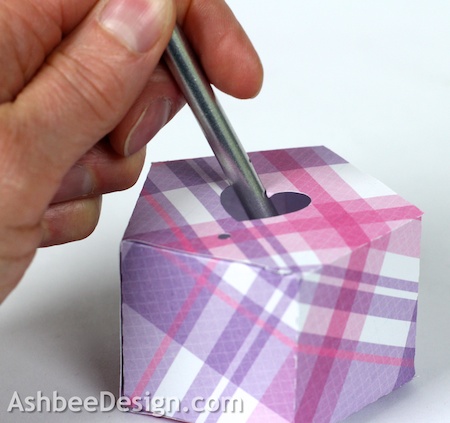
  • Take the small rectangle and wrap it tightly around a toothpick. Glue the outside edge. (But not the inside edge or it won't slide off!)

  • Insert the tooth pick with the perch into the hole beneath the entry. It will be tight and if you carefully twist the perch as you insert it, the hole will widen and you can slide it it place. If you do this carefully, the hole will stay tight and the perch will be secure.
  • Slowly, pull out the tooth pick, leaving the perch in place.


Nothing like a plaid birdhouse to brighten your home!


Go and make some more with different papers.......

Download some other patterns and make some different shapes......


And soon you'll have a neighborhood!


I brought a bunch with me to visit my grandson.  We used them on his Easter Egg tree!


**********
© 2013 Marji Roy, Ashbee Design

5.23.2013

3-D Apple Blossom Triptych • Silhouette Tutorial

Project Description: 

This projects captures the essences of apple blossoms blooming in the spring. A gnarled tree branches traverses across three shadow box panels with 3-D blossoms added. The split shadow box technique is an effective way to create a larger piece of wall art on the Silhouette. Six patterns are cut along with 15 blossoms to assemble.


Tutorial assembled using Silhouette Software Release 2.7.18.

Note: 

I am a new Silhouette Contributing Artist. Both my Silhouette files and this website are just the beginning. Template links will be updated once the file is live on Silhouette. Send along any suggestions, problems, ideas or photos as we learn to create together. I'd love to hear from you!  Marji Roy
eMail: ashbeedesignemail@gmail.com


Supplies Needed:

  • Template from Silhouette On-Line Store here.
  • Glue dots 3/16"
  • Silhouette Cameo
  • 6 sheets of 8.5" x 11" Card Stock 
  • Blue Tack Wall Adhesive (optional)
  • Foam stickt disks

Steps for completing the 3-D Tree Branch Shadow Box project:

1. Download the cutting file for your Silhouette Cutting machine from the Silhouette Online Store here. All of the patterns for this project are in one Silhouette download. They need to be separated and expanded. You will find some basic instructions included in the file. Below are some more detailed instructions with photographs.

2. Prepare the files:
The downloaded Silhouette file looks like this. Each of the 4 parts has to be copied, pasted into a new Silhouette file and enlarged.


  • Right click on the Front Frame and COPY it ( or EDIT MENU to COPY).
  • Open a new Silhouette File by going to the FILE MENU and selecting NEW.
  • Go up to the EDIT MENU and select PASTE.
  • These patterns were designed to fit on a 8.5  x 11" sheet of card stock so switch the Page settings to Letter size.
  • Click and drag from the lower corner to expand the design. Hold the shift key down as you do this to keep the pattern square. Enlarge the frame to 8" square.
  • Sizing note: You can make the shadow box smaller. Just make sure the back level is slightly smaller than the level in front of it.
3. Cut all 3 frames.
  • You will need to cut this file 3 times, one for each part of the shadow box. Save the file for the next step.
  • These are the cut settings I used with the 65 lb card stock used on this project.

4. Enlarge and cut the 3 tree branch frames.
  • The following technique will assist you in getting the inside frames sized correctly to slide into the front frames you just cut out.
  • Copy the left back frame from the original download (shown below in red) and paste it over the front frame file (shown below in thin blue) you just made and cut in the previous step.
  • Resize the left branch frame (red) so the dotted line square is just inside the dotted line square of the first frame (blue).  (Your lines will all be red. I changed the color to help demonstrate. You can also change the color if it helps you tell the files apart.)

  • Once the size is appropriate, click on the back frame (blue in my sample) and delete it. You are left with the correctly sized branch frame. 
  • Cut it out on your Silhouette.
  • Bring in the middle branch frame and paste it over the left branch frame. 
  • Enlarge it to be the same size as the left branch frame.
  • Delete the left frame and cut the middle frame.
  • Repeat with the right frame.
5. Fold boxes.
  • Note each cut file has dotted lines. These are fold lines. 
  • Fold the back layer UP and the Front Layer BACK along the dotted lines, creasing the seams.

6. Glue Corners
  • I like to use Glue Dots on the corners although other glue types are appropriate. 
  • It is important to make square corners. 


7. Assemble all three frames.
  • The back layer slides into the front layer


  • Place glue dots between the layer frames to hold them all together

8. Make apple blossoms.
  • Copy and paste the patterns for the blossoms and their centers and backs into a new document.
  • Duplicate them so you have 5 sets (15 total petals sets and 45 circles)
  • Cut them out of card stock using the Silhouette.
  • Each flower blossom is made from a petal shape and 2 circles.


  • Fold the petal shape back and forth. It is tiny so there are no fold perforations.


  • Put a Glue Dot on one of the circles and place the petal shape on that, wrapping it around so the edges that form the gap meet. This will cause the shape to curl upward and give it depth.


  • Put a glue dot on the other blossom center and put that on top of the center sandwiching the petal edges between the two circles.

  • Put a glue dot on the backside and attach the blossom to a branch.

  • Apply a scattering of different sized blossoms along the branches in the 3 shadow boxes.
  • Apply some sticky foam disks to the back to help space the branches from the wall.


8. Apply Blu-Tack to the corners in wide areas and stick the triptych to the wall.


Other notes:
You can display the shadow boxes with no backing. Your wall color will show through. If you have a patterned wall, you can insert a sheet of colored paper behind the branch layer to add contrast in your room.


**********
© 2013 Marji Roy, Ashbee Design

3-D Shadow Box Birch Tree Tutorial

2015 Note: This project is available in svg, pdf and dxf formats through my sister site at 3dcuts. com. here.

Project Description: 

This a wall art project made from 8 Silhouette files. The final assembled design is 4 separate shadow boxes mounted together to create the illusion of a pair of contemporary birch trees outside the window.


Tutorial assembled using Silhouette Software Release 2.7.18.


Note: 


I am a new Silhouette Contributing Artist. Both my Silhouette files and this website are just the beginning. Template links will be updated once the file is live on Silhouette. Send along any suggestions, problems, ideas or photos as we learn to create together. I'd love to hear from you!  Marji Roy
eMail: ashbeedesignemail@gmail.com


Supplies Needed:

  • Template from Silhouette On-Line Store here.or from 3dcuts here.
  • Glue dots 3/16"
  • Silhouette Cameo
  • 8 sheets of 8.5" x 11" Card Stock 
  • Blue Tack Wall Adhesive (optional)

Steps for completing the 3-D Birch Tree Shadow Box project:

1. Download the cutting file for your Silhouette Cutting machine from the Silhouette Online Store here. All 8 of the patterns for this project are in one Silhouette download. They need to be separated and expanded. You will find some basic instructions included in the file. Below are some more detailed instructions with photographs.

2. Prepare the files:
The downloaded Silhouette file looks like this. Each of the 8 parts has to be copied, pasted into a new Silhouette file and enlarged.


  • Right click on the Front Top and COPY it ( or EDIT MENU to COPY).
  • Open a new Silhouette File by going to the FILE MENU and selecting NEW.
  • Go up to the EDIT MENU and select PASTE.
  • These patterns were designed to fit on a 8.5 x 11" sheet of card stock
  • Click and drag from the lower corner to expand the design. Hold the shift key down as you do this to keep the pattern square.
3. Cut all 4 back files.
  • Repeat the above step with all 4 back layers in the original download.
HINT: I pasted each box pattern over the previous one and expanded it to have the box frames match.  That is the easiest method of getting same sized boxes. Once they match, I deleted the previous frame and cut the new one. Everything comes out the same size!

  • Sizing note: You can make the shadow box smaller. Just make sure the top level is slightly larger than the back level.
3. Cut all 4 back files.
  • These are the cut settings I used with the card stock used on this project.

4. Re-size the front layer and cut.
The front layers need to be slightly bigger than the back layer so they will slide over them. 

Hint: Cut one front and back file in the two different sizes first to determine proper sizing before cutting all your files. The difference in size between the front and back layers will depend on the paper you choose. You want the front layer to slide over the back layer. 

Hint: Copy the first front layer and paste it over the last back layer that you cut. Expand it so the inner frames match. The outer frame will be much larger. In the sample below I have adjusted the original back layer to blue ink so you can better see it. The red is the front layer I just paste on top. I resized the front layer so the inside frames match. You can see that the outside red frame is much larger.
  • Once you have established a proper sizing for your paper choice, cut all four front files.

4. Fold boxes.
  • Note each cut file has dotted lines. These are fold lines. 
  • Fold the back layer UP and the Front Layer BACK creasing the seams.


5. Glue Corners
  • I like to use Glue Dots on the corners although other glue types are appropriate. 
  • It is important to make square corners. 

6. Assemble all four frames.
  • The back layer slides into the front layer. 

  • The back layer is less deep than the front layer so when you slide it all they way in there will be a shadow space between the back layer and the wall.


  • Place glue dots between the layer frames to hold them all together.


7. Place on the wall.
  • I use Blu Tak or a similar product to attach to the walls with a material that doesn't damage the wall and is easy to re-position.


**********
© 2013 Marji Roy, Ashbee Design


5.22.2013

3-D Tree Branch • Silhouette Tutorial

Project Description: 

This shadow box is a simply the notch of some tree branches It is design to have a birds nest, either real or paper, added to the notch to make a pretty spring wall art. Silhouette doesn't allow me to show it with the bird's nest in the online store but I can share the entire project with you here.


Tutorial assembled using Silhouette Software Release 2.7.18.


Note: 


I am a new Silhouette Contributing Artist. Both my Silhouette files and this website are just the beginning. Template links will be updated once the file is live on Silhouette. Send along any suggestions, problems, ideas or photos as we learn to create together. I'd love to hear from you!  Marji Roy
eMail: ashbeedesignemail@gmail.com


Supplies Needed:

  • Template from Silhouette On-Line Store (Click here.)
  • Glue dots 3/16"
  • Silhouette Cameo
  • 3 sheets of 12" x 12" Card Stock 
  • Blue Tack Wall Adhesive (optional)
  • Birds Nest - use crumpled paper or a real one
  • Tiny eggs - Cadbury mini eggs work well!

Steps for completing the 3-D Tree Branch Shadow Box project:

1. Download the cutting file for your Silhouette Cutting machine from the Silhouette Online Store here. All 3 of the patterns for this project are in Silhouette download. They need to be separated and expanded.  Below are some detailed instructions with photographs.

2. Prepare the files:
The downloaded Silhouette file looks like this. Each of the 3 parts has to be copied, pasted into a new Silhouette file and enlarged.


  • Right click on the Front Top and COPY it ( or EDIT MENU to COPY).
  • Open a new Silhouette File by going to the FILE MENU and selecting NEW.
  • Go up to the EDIT MENU and select PASTE.
  • These patterns were designed to fit on a 12 x 12" sheet of card stock
  • Click and drag from the lower corner to expand the design. Hold the shift key down as you do this to keep the pattern square.
  • Repeat this step with all three layers in the original download.
  • Sizing note: You can make the shadow box smaller. Just make sure each level is slightly smaller than the level in front of it.
3. Cut all 3 files.
  • These are the cut settings I used with the 65 lb card stock used on this project.

4. Fold boxes.
  • Note each cut file has dotted lines. These are fold lines. 
  • Fold the back layer UP and the Front Layer BACK creasing the seams.


5. Glue Corners
  • I like to use Glue Dots on the corners although other glue types are appropriate. 
  • It is important to make square corners. 


6. Assemble all three frames.
  • The back layer slides into the front layer
  • The frame layer slides over both others from the front.


  • Place glue dots between the layer frames to hold them all together.
  • Here is the tree branch assembly with all three layers together:


7. Add embellishment.
  • Here I have placed a small found bird's nest into the main tree crotch. 
  • I added a few salt dough eggs. Directions here.


  • Or use crumpled paper basket filer.
  • I used hot glue and shaped the nest around a glob of hot glue.


Place the "nest" in the tree notch.
Add a few found robin egg shells.


7. Place on the wall.
  • I use Blu Tak or a similar product to attach to the walls with a material that doesn't damage the wall and is easy to re-position.

**********
© 2013 Marji Roy, Ashbee Design